
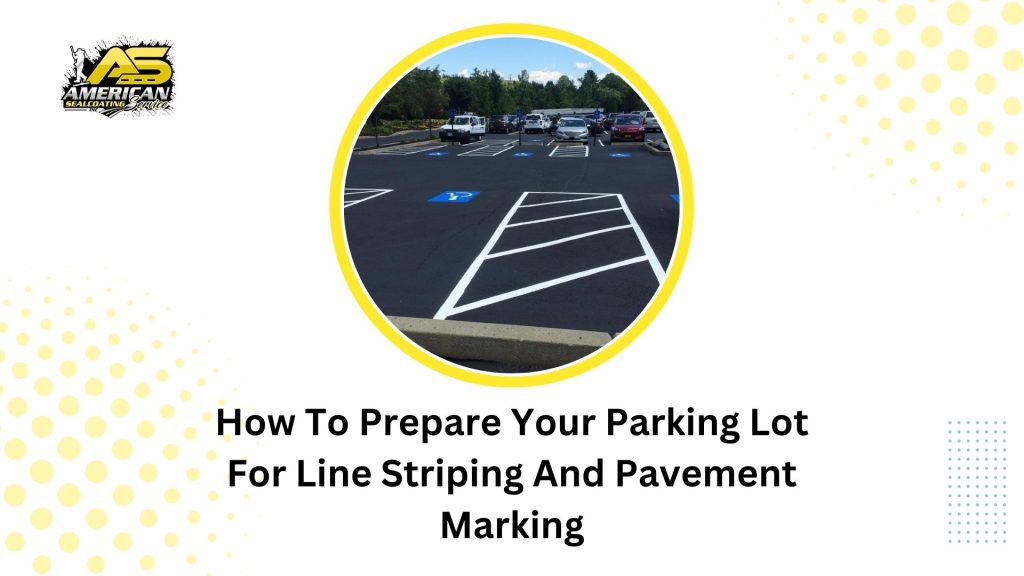
Preparation for line striping and pavement marking in Winchester, MA is necessary for achieving clear, safe, and visually appealing parking areas. You need to begin by assessing the current condition of your lot, ensuring it’s free from debris, oil stains, and other contaminants that could hinder paint adhesion. Next, marking the intended lines with chalk or string helps you visualize the layout and make adjustments. Finally, scheduling this project during off-peak hours minimizes disruptions, ensuring a smooth process while enhancing traffic flow and safety for all users.
Key Takeaways:
- Clean the parking lot surface thoroughly to remove debris, oil, and dirt before line striping.
- Ensure all necessary permits and approvals are secured prior to starting the marking process.
- Plan the layout and measurements carefully to maximize space and ensure safety compliance.
Assessing the Current Condition of Your Parking Lot
Before initiating the line striping and pavement marking process, you must thoroughly assess the condition of your parking lot. This assessment will help you identify necessary repairs and ensure the final results are both functional and visually appealing. Pay close attention to surface damage, weathering, and existing markings, as these factors will inform your preparation and execution strategies.
Inspecting for Damages
Begin by conducting a comprehensive inspection for damages such as cracks, potholes, and surface wear. Addressing these issues before line striping will not only enhance the durability of the new markings but also improve safety for drivers and pedestrians. If left unattended, these damages can worsen, leading to more costly repairs and hazardous conditions.
Evaluating Existing Markings
Your next step involves evaluating the existing markings in the lot. Identify if any lines are faded or chipped, as well as their compliance with local regulations for accessibility. Existing markings may need complete removal or touch-ups, depending on their visibility and overall condition.
Assessing existing markings is imperative because they often dictate the flow of traffic and parking efficiency. Faded lines can confuse drivers, leading to potential accidents or chaotic parking situations. Moreover, the requirement for ADA compliance necessitates regular evaluation; ensuring those markings are clear is not just a best practice but also a legal obligation. Compare your current markings with updated standards to determine if any adjustments are necessary for optimal safety and effectiveness.
Choosing the Right Materials and Equipment
Selecting appropriate materials and equipment is vital for achieving durable and visible line striping. A Handy Guide to Parking Lot Lines Striping can help you understand the options available. You’ll need to consider the type of paint and tools that best suit your parking lot’s specific conditions and usage patterns.
Line Striping Paint Options
You have several paint options for line striping, including water-based, solvent-based, and epoxy paints. Water-based paints offer quick drying times and lower environmental impact, making them popular for many parking lots. Solvent-based paints often provide greater durability in high-traffic areas, while epoxy paints are ideal for long-lasting and resilient markings. Assess the needs of your facility to choose the right paint type.
Necessary Tools for Preparation
Preparation tools are crucial for ensuring a clean surface before striping. You’ll need a pressure washer for cleaning, tape or stencils for marking lines, and a marking machine for precision application. Additional tools like brooms, squeegees, and scrapers may also help remove stubborn debris and prepare the surface effectively.
Using a pressure washer not only cleans your surface but also eliminates deep-set dirt, enhancing paint adhesion. Make sure to invest in high-quality tools such as a professional-grade marking machine, as this ensures consistent line thickness and clarity. Proper preparation tools allow you to achieve sharp, long-lasting markings that improve safety and organization in your parking lot.
Preparing the Surface for Striping
Before you start the striping process, ensuring your parking lot surface is adequately prepared is vital for achieving a clean and professional finish. This involves not only cleaning but also repairing any damage to the pavement that could interfere with the line application. A well-prepared surface will enhance the durability and visibility of your markings, ultimately reducing the need for frequent maintenance.
Cleaning Techniques
To prepare your parking lot, begin with a thorough cleaning technique that includes sweeping, pressure washing, and degreasing. Utilize a commercial-grade pressure washer to eliminate dirt, grime, and oil stains that have accumulated over time. Special degreaser solutions can be effective for stubborn spots, ensuring you achieve a pristine surface. Allow adequate drying time post-cleaning to maximize paint adhesion.
Filling Cracks and Potholes
Addressing cracks and potholes is imperative before applying any striping. Use a high-quality crack filler for small fissures and an appropriate patching material for larger potholes. Both repair processes help create a smooth, even surface that prevents paint from chipping away or fading prematurely.
Taking time to fill cracks and potholes not only improves aesthetics but also protects against further damage. For cracks, choose a filler that expands and contracts with the pavement, ensuring durability. For potholes, a cold patch or asphalt mix works well, with proper compaction needed to create a stable base. Conduct a final inspection after repairs to confirm that all areas are thoroughly smoothed out, allowing for optimal paint application and longevity of your pavement markings.
Planning Your Layout
Start by assessing your parking lot’s dimensions and existing features to create an effective layout that maximizes space and improves traffic flow. Drawing a scaled diagram can help visualize the allocation of parking spots, drive lanes, and pedestrian pathways. Factor in accessibility requirements and consider the flow of both vehicles and foot traffic to optimize your design.
Understanding Parking Lot Design
Each parking lot design caters to specific needs, such as the type of vehicles it services and the expected volume of traffic. Typical layouts include angled, perpendicular, or parallel configurations, with the common ratio being one parking space for every 200-300 square feet of paved area. Also, the incorporation of adequate aisles and space between rows enhances maneuverability, thus improving safety.
Marking Guidelines and Standards
Adhering to industry marking guidelines ensures your parking lot remains accessible and meets legal requirements. The Americans with Disabilities Act (ADA) specifies that accessible parking spaces must be at least 8 feet wide with an adjacent access aisle of 5 feet (or 8 feet for van spaces), while the ratio of accessible spaces should be based on the total number of parking spots. It’s also important to consider markings like directional arrows and crosswalks for additional clarity.
Utilizing established marking guidelines not only promotes safety but also enhances the overall efficiency of your parking area. For example, the Institute of Transportation Engineers (ITE) suggests specific widths for lines (typically 4 inches for standard spaces and 6 inches for major roadways) to ensure visibility. Additionally, incorporating color codes can further aid in navigation and compliance; for instance, yellow lines often indicate one-way traffic while white is used for parking spaces. Following these guidelines can significantly improve user experience and minimize liability issues.
The Application Process
Once your surface is prepped and your layout planned, you’re ready to begin the application process. Using a high-quality line striping machine, carefully apply your chosen coating to create clear demarcations as per your layout. Maintaining a steady hand and uniform speed will help ensure even lines and optimal paint thickness. Be mindful of weather conditions, such as wind or moisture, which can affect how the paint adheres and dries.
Best Practices for Line Striping
To achieve the best results during line striping, prioritize consistency in your application technique. Utilize appropriate striping equipment tailored for your surface and paint type. Conduct a test strip in an inconspicuous spot to gauge paint adhesion and saturation. Additionally, work during cooler times of the day to prevent rapid evaporation, which can compromise the quality of your lines.
Ensuring Proper Drying and Curing Time
Allow sufficient drying and curing time before allowing traffic back onto the newly striped surface. Each paint type has specific recommendations for drying times, typically ranging from one to several hours. Adhering to these recommendations is vital for long-lasting results.
For optimal results, check the manufacturer’s guidelines for the specific paint you are using; for instance, alkyd-based paints may require up to 48 hours to cure fully under ideal conditions, while latex paints often dry to touch in as little as one hour. Environmental factors like humidity and temperature can significantly impact these times, so it’s wise to monitor conditions closely. By providing adequate time for drying and curing, you ensure that your stripes maintain their vibrancy and adhesion, ultimately prolonging the life of your pavement markings.
Maintenance Tips for Longevity
To ensure the longevity of your line striping and pavement markings, implement a routine maintenance schedule. Consider the following tips:
- Schedule regular inspections to assess wear and tear.
- Perform touch-ups in high-traffic areas as needed.
- Keep your parking lot clean from debris and oil spills.
- Consider applying a sealant to protect markings.
- Use durable, high-quality materials for initial applications.
Thou can significantly enhance the lifespan of your markings through consistent upkeep.
Regular Inspections and Touch-Ups
Frequent inspections allow you to identify faded or damaged areas promptly. By performing touch-ups regularly, you help maintain crisp and visible line striping, which is important for safety and efficiency. Aim for inspections at least biannually, or quarterly in particularly busy lots.
Protecting Your Markings from Wear
To extend the life of your pavement markings, consider barriers or directional signs to manage traffic flow effectively. Additionally, using high-quality reflective paint can combat fading from UV exposure. Limit heavy vehicle access on freshly marked areas and apply a protective sealant after marking to shield from chemicals and weather. These measures, combined with proactive maintenance, ensure that your markings remain vibrant and clear for an extended period, reducing the need for frequent re-striping.
Conclusion
Preparing your parking lot for line striping and pavement marking requires careful attention to detail, and no one understands that better than American Sealcoating Service Inc.. Our team of asphalt contractor in Winchester, MA ensures your lot is cleaned, repaired, and properly laid out for clear, durable, and professional results. From removing debris and filling cracks to selecting the best paint and equipment, we handle every step with precision. When you trust our experts, you’re guaranteed long-lasting markings that enhance safety, organization, and curb appeal—making your property stand out for all the right reasons.